Leaking chimney fixed and re-stuccoed
Charlottesville, Virginia
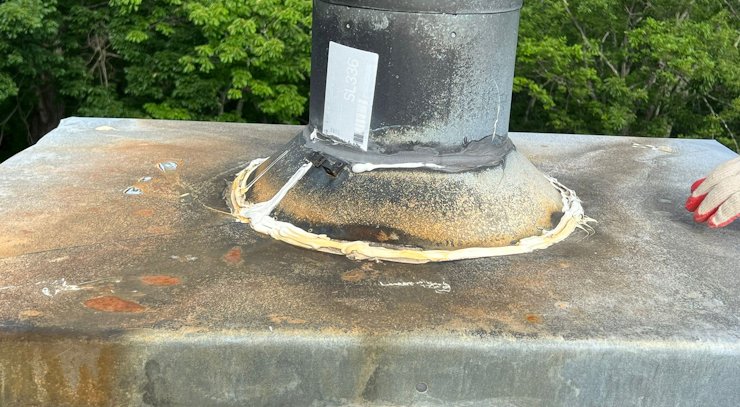
We're the third contractor called in to fix this leak (and the last).
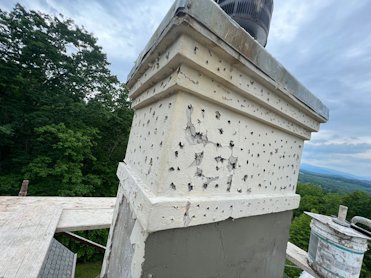
How can somebody do work like this ? This cap is put on backwards. Another water funnel.
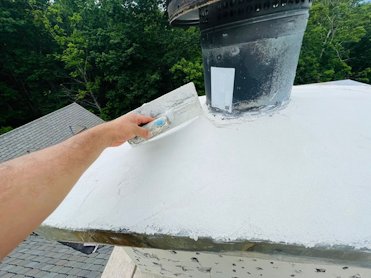
We put on mortar to sculpture the top correctly, from the center down. We used white portland because it sets fast.
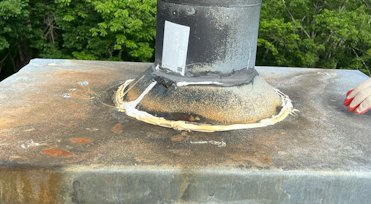
Here. we put the rubber membrane on. We took off the spark arrestor to get a good fit. If we put on the membrane first,
water that penetrates the mortar at the top would pool on the membrane and be trapped.
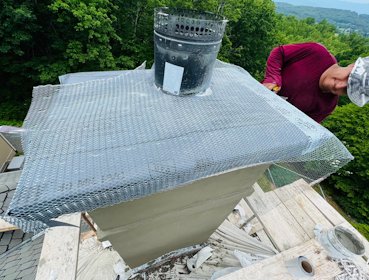
Metal lath is put on and wrapped around the sides.
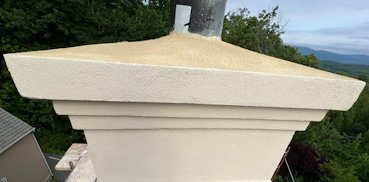
Finished crown won't fail. Top is higher in the center for good water run off, and a rubber membrane
backs up the mortar, preventing water from infiltrating and pooling on the backwards metal cap.
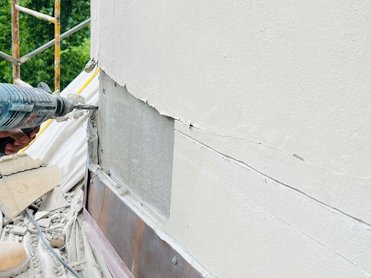
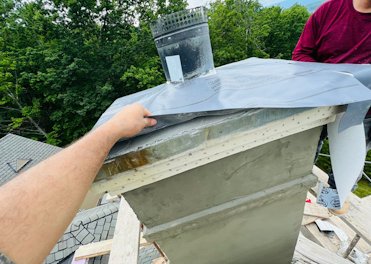
We cut off the stucco above the brand new copper flashing (yes, brand new) to put our S flashing over the top.
There is no metal lath on this chimney. Chimney is durock with thin set for ceramic tile base, so the
mortar is knocked off easily.
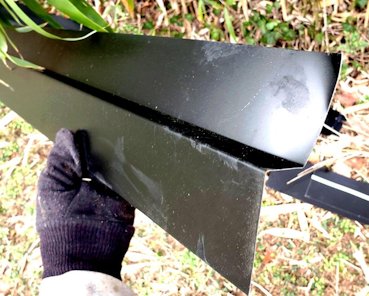
A view of our typical S flashing.
Chimney is chipped and recoated.
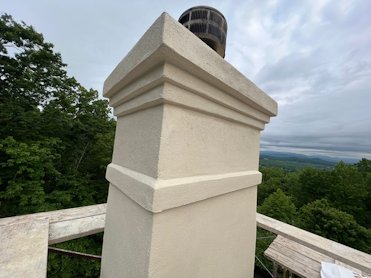
Chimney finished with an off white cement finish. Note how the mortar on the band is angled at the top so
water runs off.
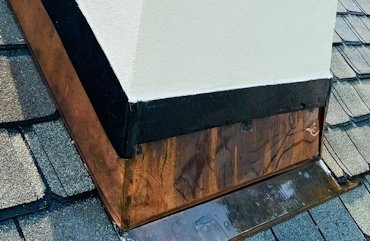
Finished chimney. Copper flashing is overlapped with our S flashing, which is overlapped with lath and stucco.
We are missing a couple of pictures, but hopefully you can see what is going on. We did the same thing on the referring page.
Now any water that penetrates the stucco will trickle down, hit the S flashing, and exit, instead of running into the house.